Blog
Car Accessory Installation Tips: Avoid Peeling, Misalignment, and Paint Damage
Car Accessory Installation Tips: Avoid Peeling, Misalignment, and Paint Damage
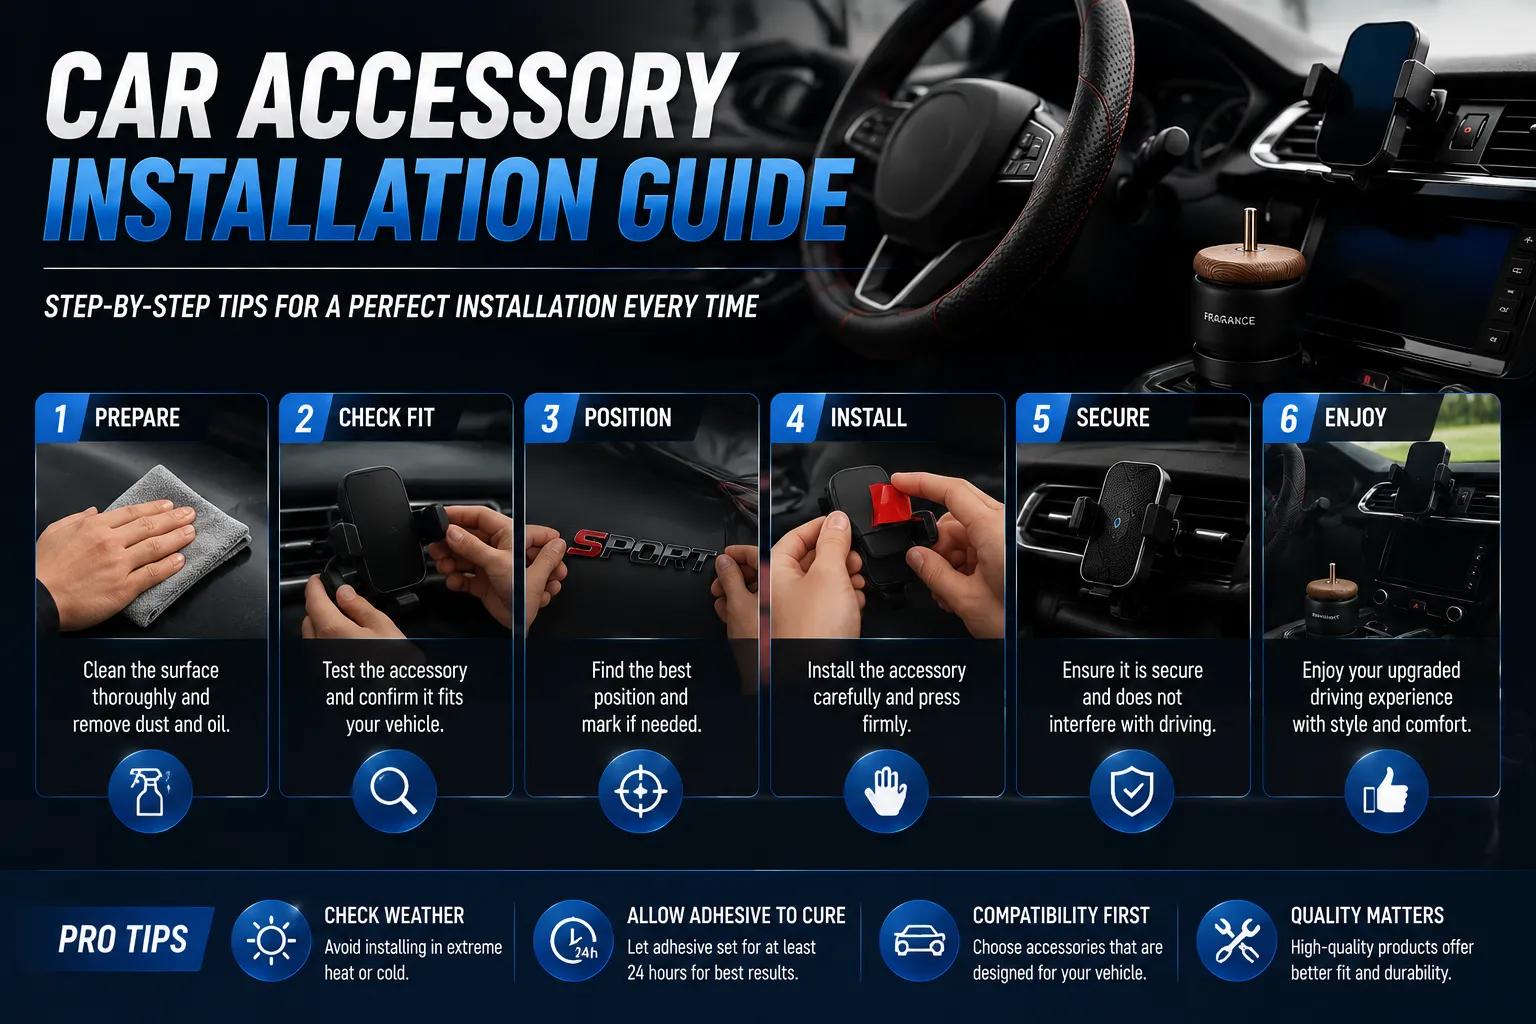
Installing car accessories may seem simple, but many failures are caused by preparation errors rather than product quality. Understanding key installation steps reduces risk and enhances user satisfaction.
1. Confirm Compatibility
Different materials require different mounting techniques. Metal badges, ABS trim, and resin decorations may have unique adhesive or clip requirements.
2. Clean the Surface
Dirt, wax, or silicone residue can reduce adhesive strength. Use alcohol or specialized cleaners and ensure the surface is dry before installation.
3. Mind the Temperature
Most adhesives perform best between 15–30°C (59–86°F). Extreme temperatures can compromise bonding.
4. Position Carefully
Use tape or markers to confirm placement. Emblems must be level and symmetrical. Misaligned installation can damage adhesive and surface finish.
5. Apply Pressure Evenly
Press firmly for 30–60 seconds to ensure good contact. For longer trims, press in segments to avoid gaps.
6. Allow Curing Time
Adhesives typically need hours to reach full strength. Avoid washing or exposing to harsh weather until fully cured.
7. Safe Removal Techniques
If replacing accessories, heat and soft tools minimize paint damage.